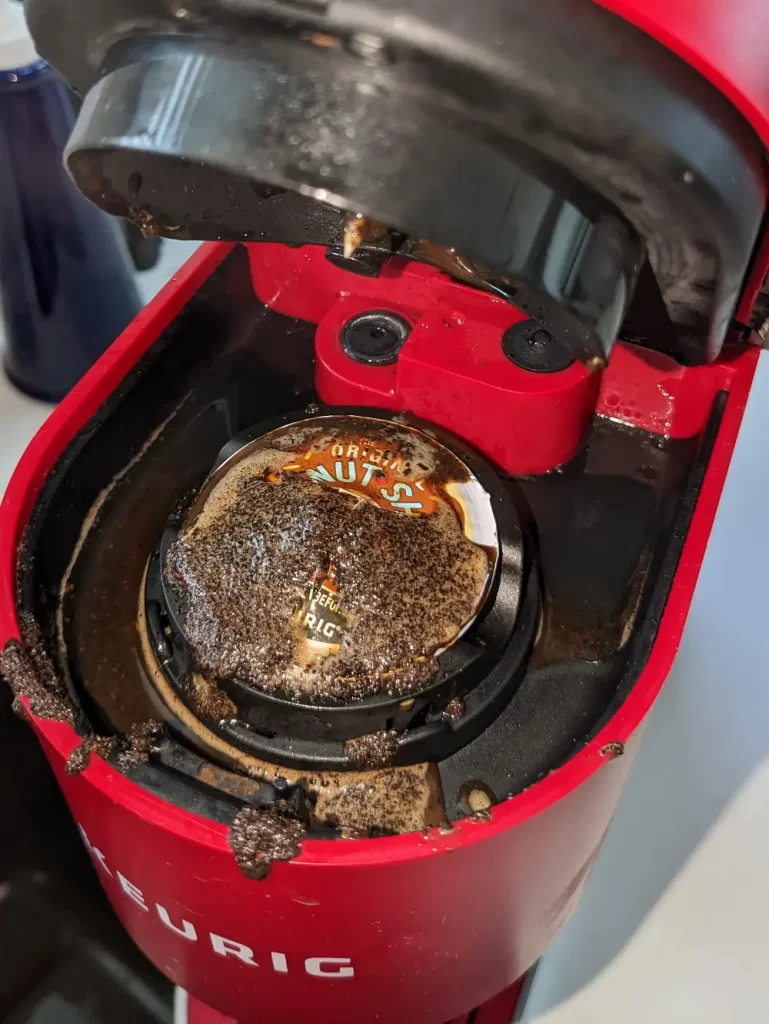
You use a single-serve coffee machine, like a Keurig for example, for convenience and a mess-free experience.
But if you constantly open your coffee maker to find that the pod has exploded and you are left with a mess to clean, that’s the exact opposite of what you signed up for!
In this post, I’ll walk you through possible reasons that lead your coffee pods to explode inside the machine when you brew it and how you can fix them.
This is an issue that is not specific to one coffee maker brand, it can happen in a Keurig, Cuisinart, Hamilton Beach, or Ninja coffee maker. Any coffee machine that works with K-Cups is prone to face this problem.
Why K-Cups Explode
To avoid this, you’ll need to make sure that the coffee pod is punctured from both sides to ensure smooth coffee and air flow.
How To Stop Coffee Pods From Exploding
To prevent coffee pods from exploding and leaving all grinds inside the machine, check these fixes one by one…
Fix Clogged Or Dull Puncturing Needles
A puncturing needle is the part responsible for puncturing the coffee pod and releasing water through it.
On a Keurig machine, there is a needle that punctures the pod from the top and another from the bottom. Other brands should have the same needles.
When the top needle, which is a hollow needle that runs water through it, gets clogged, pressure builds up causing the pod to explode.
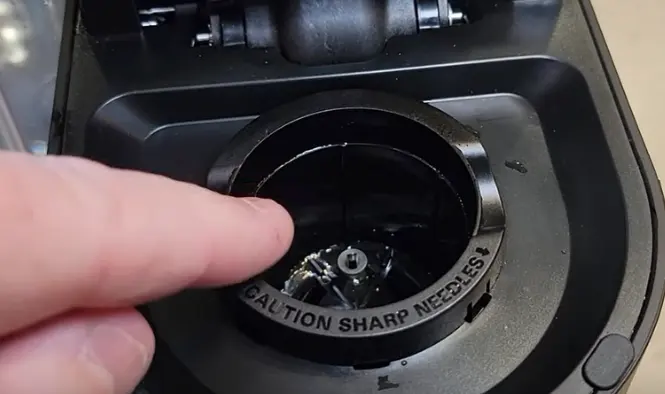
When the needle on the bottom is not sharp enough to pierce the pod, water overfills inside the pod and causes it to explode.
Apply Pressure To Ensure the Pod Got Punctured
When inserting a coffee pod, you can try and push it down manually into the bottom needle to make sure that it gets punctured. You should hear a pop to confirm that it got punctured.
And while closing the lid, apply some pressure again to ensure that the pod got punctured.
Keeping Your Needles Clean
Cleaning the brew needles is a simple yet crucial step to avoid clogs and coffee pod explosions. Clogged needles happen over time due to coffee residue, cleaning your machine regularly will help you avoid this problem.
Here’s a step-by-step guide to keeping your needles clean:
- Unplug your coffee machine.
- Take a straightened paperclip and gently insert it into each needle to dislodge any trapped particles. Be careful not to damage the needles.
- Fill the water reservoir with a mixture of equal parts distilled white vinegar and water.
- Place a cup or mug on the drip tray to collect the solution.
- Run several brew cycles using only the vinegar-water solution. This will help remove any remaining debris and thoroughly clean the needles.
- Once the cycles are complete, refill the water reservoir with fresh water and run additional brew cycles to rinse out any vinegar residue.
![Why Coffee Pods Explode Inside Your Machine [Causes & Fixes]](https://www.super-espresso.com/wp-content/uploads/2023/12/Punctured-K-Cup-Pods.webp)
Preventing Clogs From Happening Again
In addition to cleaning the brew needles, there are a few preventive measures you can take to avoid clogs and maintain a hassle-free brewing experience:
- Use filtered water to reduce the chances of mineral deposits clogging the needles.
- Avoid using coffee grounds that are too fine or compacted, as they can clog the needles. This applies to reusable pods only.
- Regularly descale your coffee machine according to the manufacturer’s instructions to prevent mineral buildup.
- Don’t leave a used K-Cup pod inside the machine after brewing. Disposing of the coffee pod after brewing ensures that residue doesn’t dry up inside the needle.
By keeping your brew needles clean and following these preventive measures, you can enjoy a trouble-free brewing experience and avoid the frustration of coffee pod explosions.
| Common Causes of Clogged Brew Needles | Preventive Measures |
|---|---|
| Accumulation of coffee grounds | Use coarser coffee grounds and avoid overfilling the coffee pod. |
| Mineral deposits from hard water | Regularly descale your coffee machine using distilled white vinegar or a descaling solution. |
If You Are In a High-Altitude Area, Pre-Puncture the Pod
Altitude can significantly impact the pressure inside coffee pods, increasing the risk of explosions.
All K-cup coffee machines are designed to brew at elevations up to 5,000 ft, if you’re at a higher elevation, you need to manually puncture the pod before brewing to avoid it from exploding.
One way to release the pressure is by using a small pin to puncture the pod’s lid or by pushing it down on the bottom needle in the brew basket. This allows the excess pressure to escape, reducing the likelihood of a coffee pod explosion during brewing.
Another method is to place the pod in the pod holder and push it down with your hand to puncture it from the bottom using the needle inside the machine.
Don’t Overfill a Reusable K Cup Pod
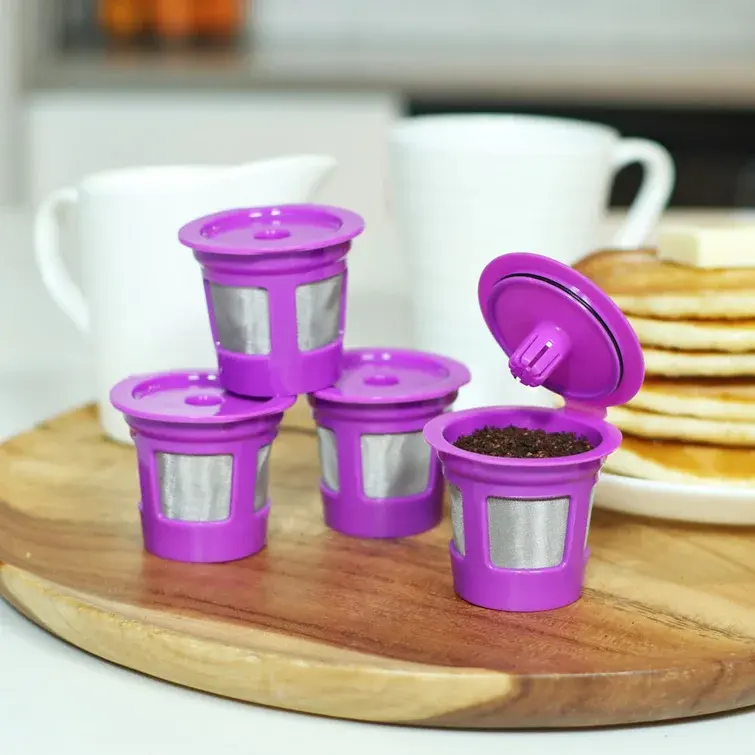
When it comes to coffee pod explosions, one common cause is overfilled pods. But this is only valid when you are using a reusable or refillable pod, like My K-Cup filter pod.
Oftentimes, users will overfill the coffee pod, leaving no space for water to flow or penetrate the coffee grounds, which leads the water to back up and leak.
When using a refillable coffee pod, you’ll want to keep some space on top to allow the water to saturate the pod without getting forced back up and causing an explosion.
Use Medium Coffee Grounds Only
This is another tip for users of refillable coffee pods. If you’re using a K-Cup pod machine, NEVER use fine-ground coffee.
These are considered drip coffee machines, only medium-ground coffee should be used.
If you are buying pre-ground coffee, look for packages that say medium ground or suitable for filter coffee. Avoid coffee for espresso or moka pots.
When you use fine coffee grounds, the pod gets very compacted and because a K-cup brewer uses dripping water flow, and not high pressure like an espresso machine, it gets really hard to saturate and get the water through the other pod’s end. And you end up with a coffee explosion inside the machine.
Check For Weak Seals and Damaged Pods
Sometimes, coffee pods get damaged during shipping or storage.
Before brewing a pod, you’ll want to check that the foil on top is sealed completely and does not have any leaks. If the pod is not sealed as it should, coffee could come out of either side of the pod instead of flowing from the bottom, which in turn causes the pod explosion.
How To Clean Keurig Pod That Has Exploded
If a coffee pod has exploded inside your machine, cleaning the grinds is messy but easy to do. To make it easier, never let the grinds dry, clean immediately.
You’ll need to do two things: clean the external part of the machine, then run a cleaning cycle to get rid of grinds inside the machine.
Cleaning the exterior:
- First, unplug your machine.
- Use a damp cloth or paper towel to wipe out the majority of the coffee grinds and dry out the coffee liquid.
- If necessary, you can tip the coffee machine over the sink and use water around the pod holder. But using a wet towel is always the safer option. You don’t want electric parts reaching the water.
- The pot holder is removable. Take it out and wash it completely in the sink.
Cleaning the interior:
- When your machine is fully dry, plug it in and turn it on.
- Without a pod inside the machine, press any of the serving sizes to brew an empty cycle. This will help get rid of any coffee grinds inside the machine.
- Run this cycle as many times as needed until the water comes out clear.
Now your machine is ready to use again, go over the tips above to make sure that the problem won’t happen again.

No Comments